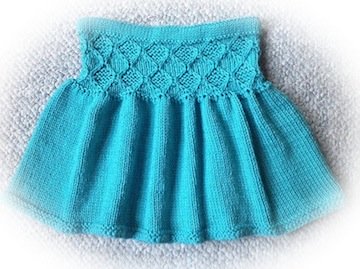
Cute Vest For Girls - A Vest With Scallop Edge
Free Knitting Pattern
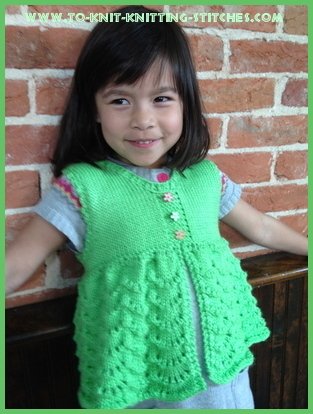
I didn't even think about designing this scallop vest until a knitter/visitor had asked if I had a vest pattern to go with the Scallop-Edge Skirt. A few days later, I began to develop the image of scallop vest patterns in my head. Finally, the reality came true as you can see in the pictures. I think it looks more like a summer tank than a vest, but I will call it vest anyway.
This vest would probably fit girls age 3-6 depending on how big their chests are. Use bigger needle to create a larger size and smaller needle to make a smaller one. I used circular needles throughout this pattern except for the arm hold edging.
CLICK HERE to down load this vest pattern in a PDF file.
Skill Level: Intermediate
Finished Measurement: Chest circumference = 24 inches, length = 15 inches.
Gauge: 4.5 sts/inch on US #8 (5mm) needle
Materials:
1. 1 skein (6 oz/ 170 g / 315 yds/ 288 m) of Caron Simply Soft in color of your choice.
2. 20 inch circular knitting needle US # 8 (5mm)
3. stitch markers
4. crochet needle size G
5. tapestry needle
6. 3 cute little buttons or ribbon bows
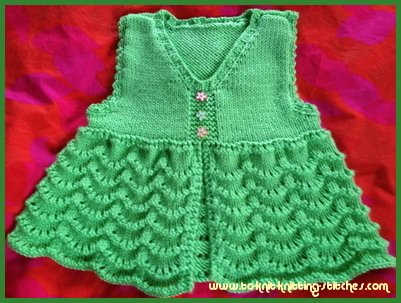
Image 2: Full Body of Green Scallop Vest
Direction:
Back: Cast on 54 sts. Do not join yarn in round. Knit in stockinet stitch (k one row and purl one row alternately) for 1 inch ending with a wrong side row.
Begin armholes decreasing as follow:
Armhole Decreasing:
Row 1 (right side): Cast off 3 sts, k to the end of row.
Row 2 (wrong side): Cast off 3 sts, p to the end of row.
Row 3: Cast off 1 st, k to the end of row.
Row 4: Cast off 1 st, p to the end of row.
Repeat row 3 and 4 once more.
Continue working in stockinette stitch until piece measure 5 inches from armhole decreasing, ending with a wrong side row.
Then work on neck shaping as follows:
Back Neck Shaping of scallop vest:
one of many good things about circular needle - I can just leave my non-working right shoulder sts on the same needle while working on the left side.
Row 1(right side): K 12, Bind off 20 sts, k to the end. Now you'll be working on the left side of back only.
Row 2 (wrong side): P 12, turn work.
Row 3: Sl 1, k1, psso, k to the end.
Row 4: P 11. Turn work.
Row 5: Sl 1, k1, psso, k to the end.
Row 6: Purl 10.
Row 7: BO all 10 sts. Cut off yarn.
Now work on right side of back as follows:
Row 1 (right side): Attach yarn at the beginning of the row and knit to the last 2 sts, k2tog.
Row 2: Purl.
Row 3: K to the last 2 sts, k2tog.
Row 4: Purl.Row 5: Bind off all stitches. Cut off yarn.
Work Front of Scallop Vest as Follows:
Cast on 54 st. Do not join yarn in round.
Next row (right side): K 24, Place marker (PM), K 6, PM, K 24.
Next row: P 24, slip marker, K6, slip marker, P 24.
Continue working on these two rows until piece measure 1 inch from cast on row.
Work armhole decreasing as for back while keeping 6 sts between markers in garter stitch (knit all rows). Continue working until piece measure 3 inches from cast on. Ending with wrong side row.
Neck shaping for scallop vest: (work on both sides at the same time)
Row 1 (right side): K 19, bind off 6 sts, k to the end.
Row 2 (wrong side): P 19, attach the other end of yarn from the the same skein and purl the other half to the end.
Row 3: (Left front) K 17, k2tog. Right front : Sl 1, k1, psso, K to the end.
Row 4: Purl.
Continue working on right and left fronts while decreasing 1 sts at each neck edge every other row (every right side row) until 10 sts remain on each end. Then continue working in stockinette stitch until piece measure as the same as back. Bind off all stitches. Cut yarn, leaving 12 inches on each side for sewing shoulder seams together.
Joining the pieces together
With right sides together, sew the right front piece and the back piece together at shoulder and side. Do the same with the left front piece.
Now the fun begins:
We will be working on the bottom half of the vest next. Turn piece upside down and with the front facing up, pick up the 3rd garter stitch at center front and knit (see images below).
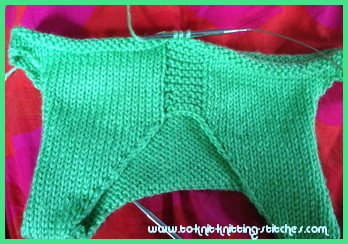
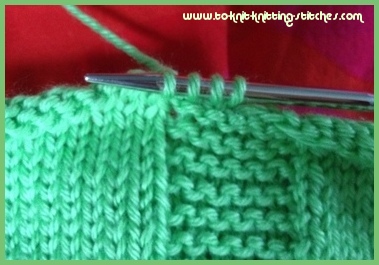
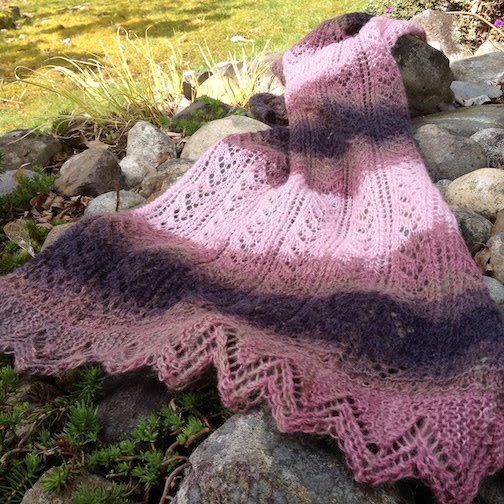
Image 3-4: Picking up stitches along the bottom edges for the scallop vest
Continue picking up stitches along the edge of the vest until the end of row. You should end up with 106 sts. If you ended up with more or less than 106 sts, you can just eliminate or add stitches to it. Do not join yarn in round.
Next row: (wrong side): knit.
Next row (increasing row with eyelets): K 2, yo, *k1, yo; repeat from * to the last 2 sts, k2.
Next row: knit.
Next row: Knit and increasing sts evenly, so that you end up with 212 sts. Total.
Next row: knit.
Begin Scallop Pattern Rows as the follow:
**Note: all slip sts are in knitwise
Row 1: K 2, *sl 1 knitwise, k1, psso, k 9, k2tog; repeat from * to the last 2 sts, k 2.
Row 2: K 2, p to the last 2 sts, k 2.
Row 3: K 2, *sl 1, k 1, psso, k7, k2tog; rep from * to the last 2 sts, k 2.
Row 4: Same as row 2.
Row 5: K 2, *sl 1, k 1, psso, yf, [k 1, yf] 5 times, k2tog; rep from * to the last 2 sts, k 2.
Row 6: Knit.
Repeat these 6 rows 6 more times or longer if preferred. Bind off all stitches knitwise.
Finishing off the neck band as follows
Begin picking up sts at center of the back and knit toward the left neck edge, right neck edge and another half of the back. I've got 88 sts all together. Begin 2 x 2 ribbing (k 2, p2) and working in round for 4 rounds. Bind off sts knitwise and purlwise accordingly.
Finish armhole edgings in chain stitch as follow:
If you don't know how to crochet, you can knit a few rows of 2 x 2 ribbing or do a couple rows of garter stitches. I think either way will look as lovely.
Row 1: Do SC (single crochet) along front and back of the armholes.
Row 2: *ch 3, 1 sc into the 3rd st; rep from * to the end.
Do the same on the other side of armhole. Cut yarn. Add buttons or ribbon bows at center front, block piece and ta..ta..you're done! Now you can give it to someone you love.
Let me know if you find any mistake or something that doesn't make sense to you. And please share your finish photo with me and I will feature your work on this site. I hope you and your love ones enjoy this lovely scallop vest.
CLICK HERE to down load this vest pattern in PDF file.
Leave Scallop Vest To Easy Knitting Pattern
Go To Knitting Instructions Home Page
